
If the substrate joints are uneven, you can use putty for localized leveling and sanding. After that, apply a coat of wall sealer to prevent powdering of the putty layer. Once prepared, the surface is ready for direct installation of flexible stone.
-
55. How to handle uneven joints at board substrate connections?
-
56. How to handle the outside corners of the wall?
1. Use an angle grinder to bevel the edges of the product at a 45° angle
2. After filling with adhesive, attach the panel to the corner and tap it evenly using a tapping board.
For detailed instructions, please refer to the video
-
57. How should the seams be treated?
There are four methods to treat seams:
- Color-matched grout treatment
- Blade seam treatment
- Metal edging strips
- Grout leakage seam treatment
For detailed instructions, please refer to the video.
-
58. Can flexible stone be installed with tight joints?
It is not recommended to install flexible stone with tight joints. Since flexible stone is a breathable material with a water absorption rate of about 10% (similar to ceramic products), it experiences slight expansion and contraction due to temperature changes. Therefore, it is advised to leave a 2mm blade seam (natural seam) or use color-matched grout, which enhances both aesthetics and durability.
-
59. Can installation be done in low temperatures?
No, adhesive performance is poor at low temperatures, so it is not recommended to install below 5°C. In winter, flexible stone products may become hard or deformed when stored in cold conditions. If this happens, place the products indoors or in the sun to allow them to naturally rebound before installation.
-
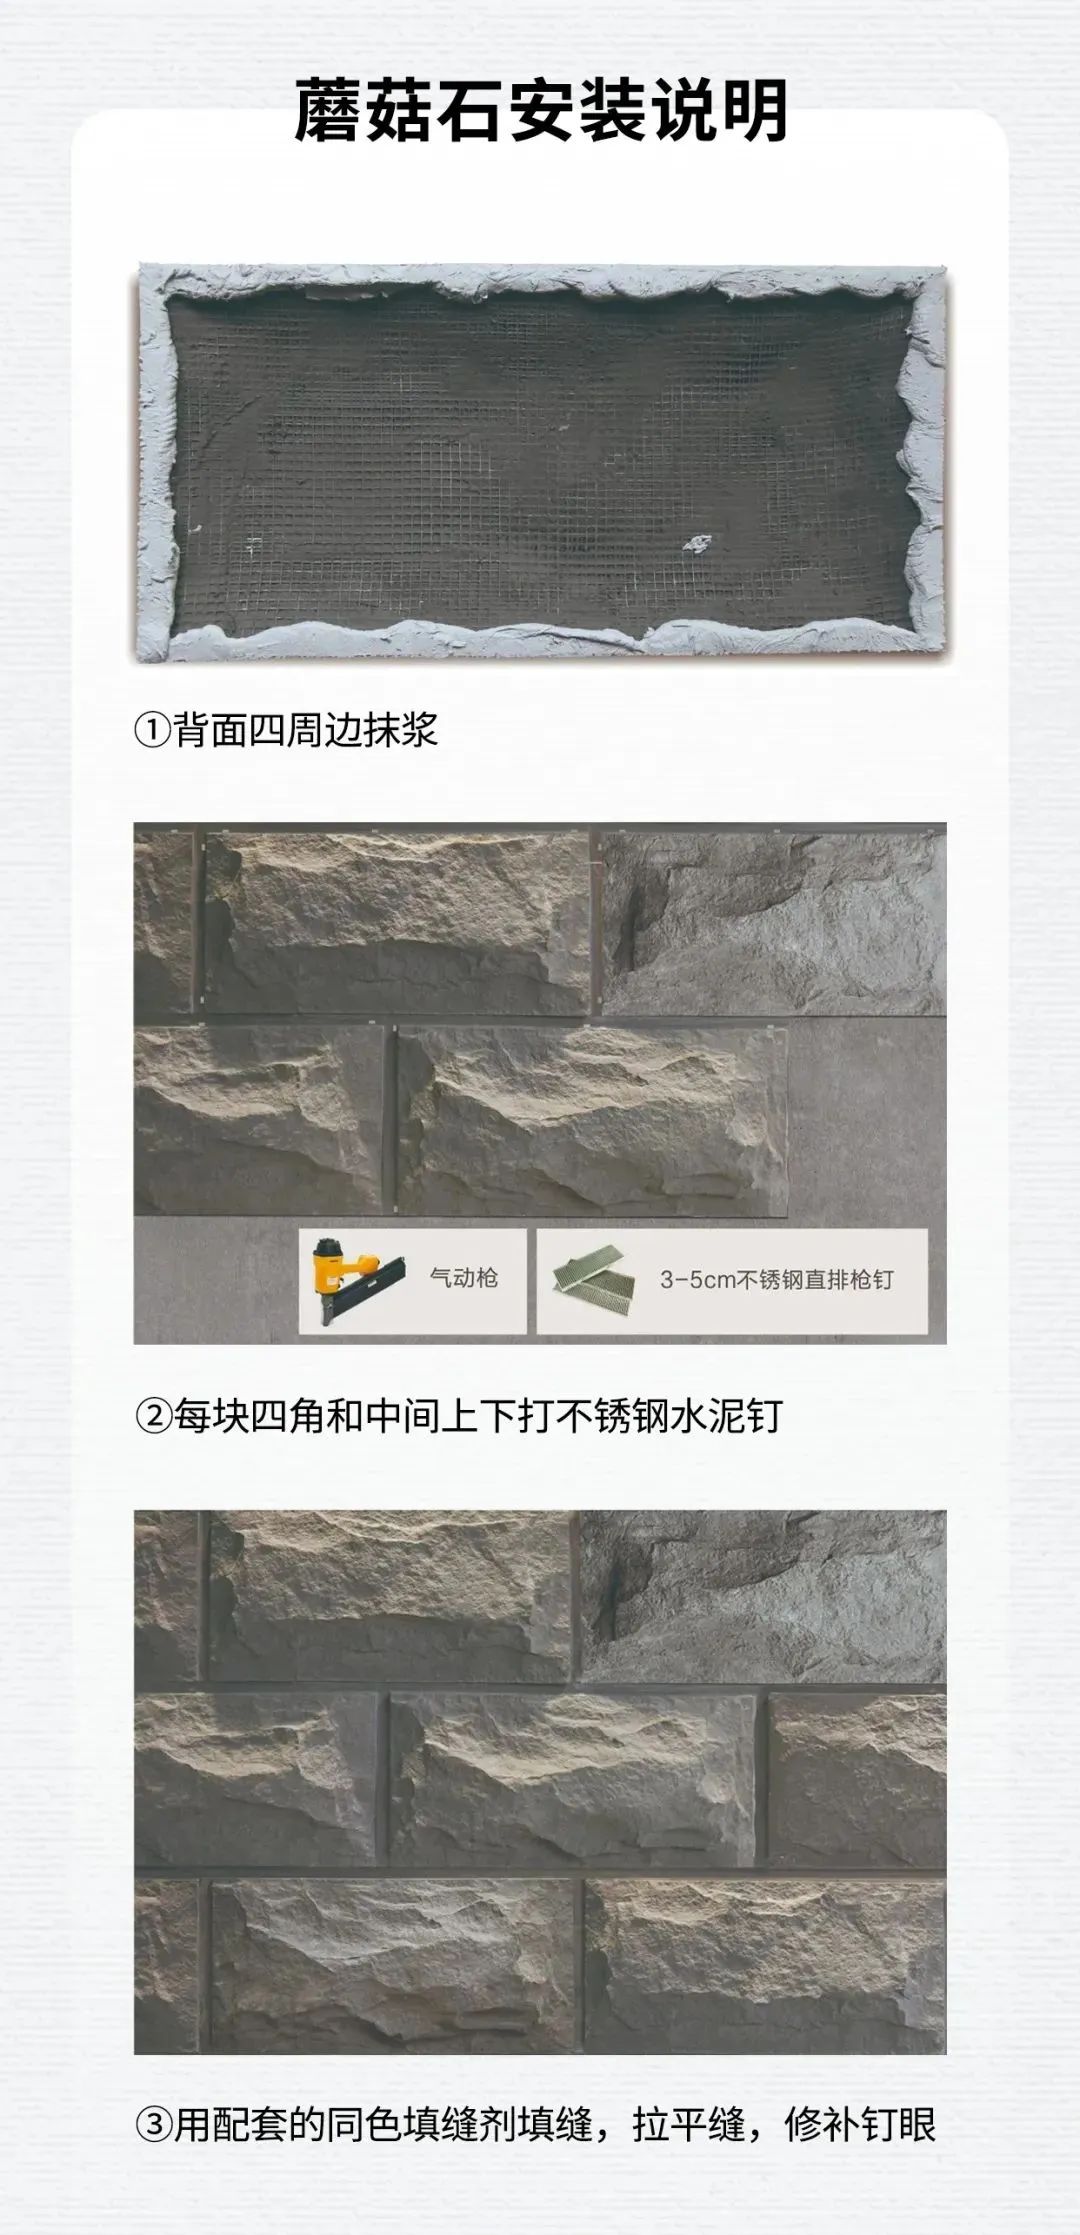
60. How to install flexible stone mushroom stone products?
-
61. Can flexible stone be drilled?
Yes, flexible stone can be drilled.
-
62. Can the direction of the texture or pattern be changed?
Changing the texture direction requires custom mold-making, which incurs additional customization and mold fees.
Changing the pattern direction can be done by adjusting the design, but it also involves customization and pattern setup fees.
-
63. How to handle the substrate for creating curved shapes?
To create curved shapes on a vertical wall, follow these steps:
Cut bendable wooden strips into the desired curve shape.
Assemble and fix the curved strips with horizontal wooden slats.
Apply fire-resistant boards and waterproof gypsum boards as the base layer on the frame.
Create grooves on the back of the gypsum board to allow for bending.
Once the base is prepared, smooth the surface by applying putty to avoid issues like unevenness or hollowing.
For areas exposed to water, an additional waterproof layer should be applied over the putty before installation.